
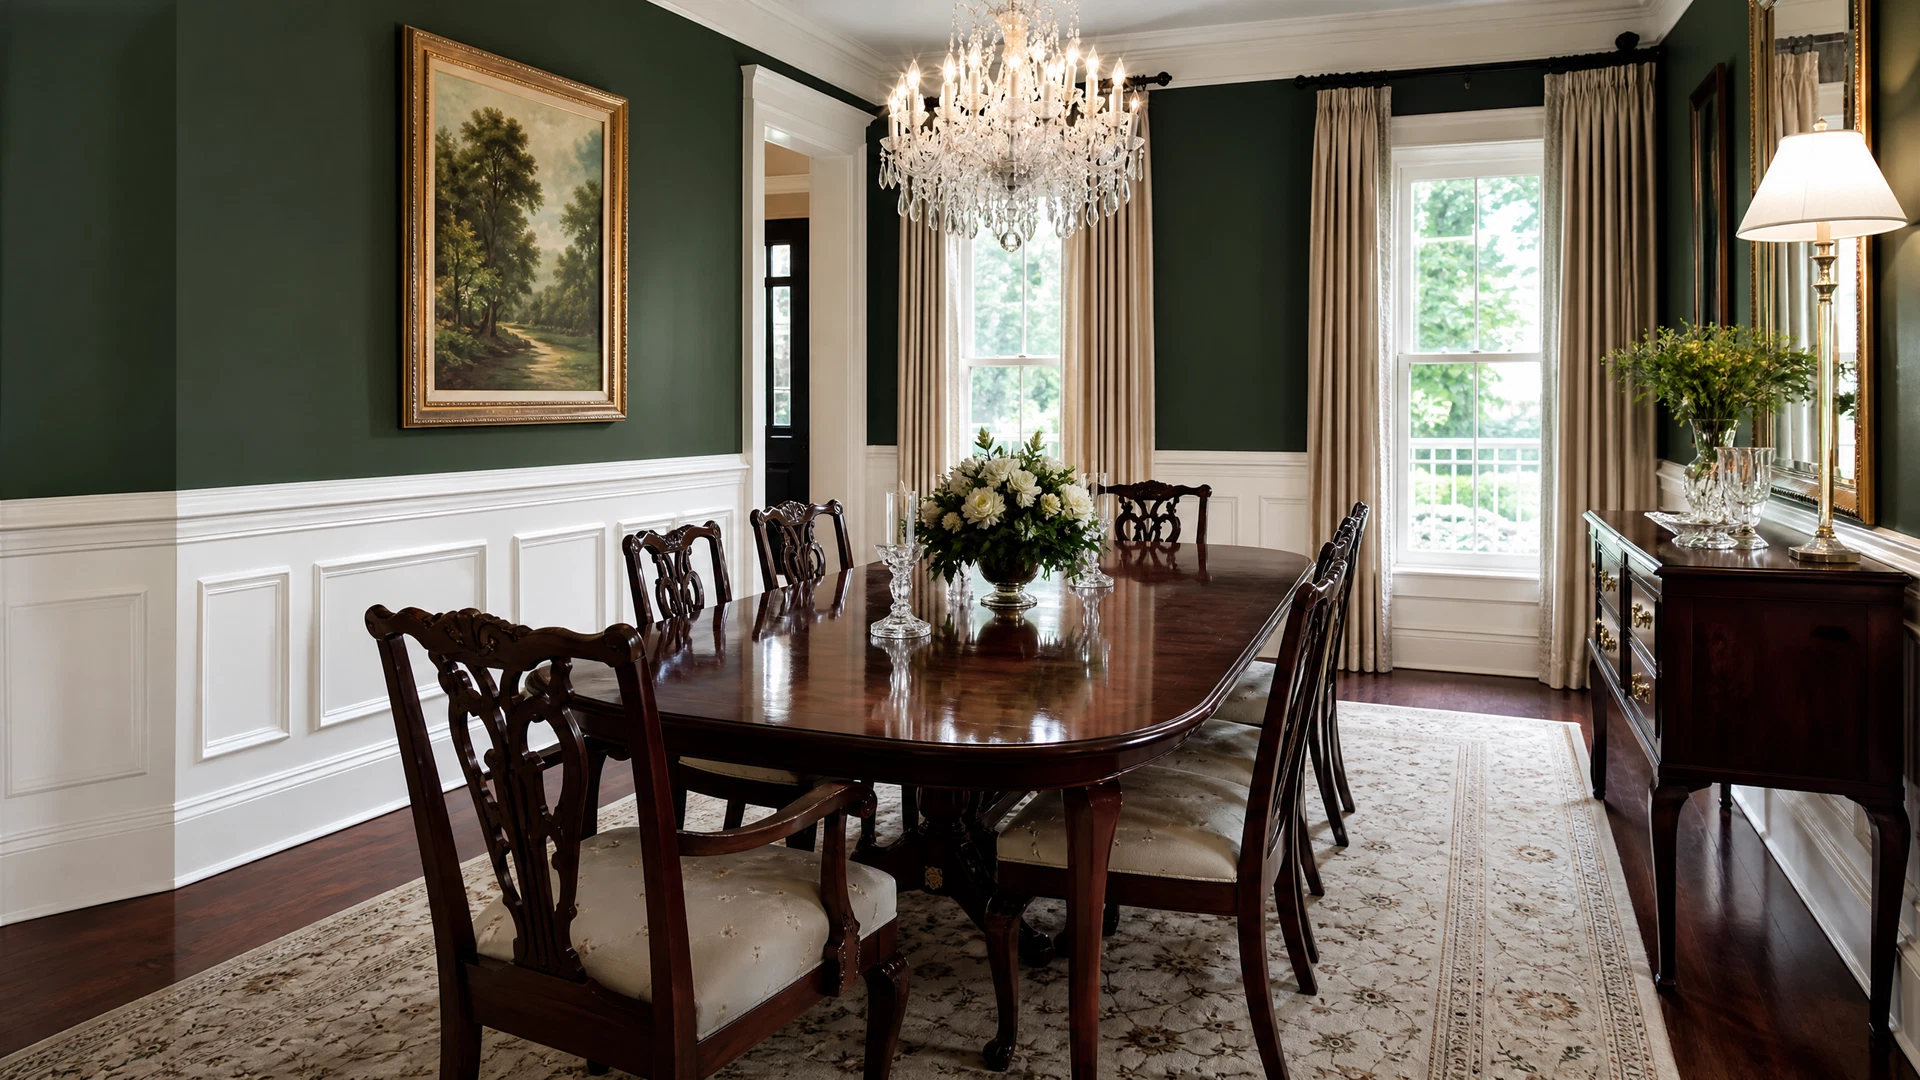
Wainscoting is one of the most transformative finish carpentry upgrades you can add to your home. This classic wall treatment — which covers the lower portion of your walls with decorative paneling — adds depth, texture, and architectural character to any room. Whether you’re renovating a historic Charleston home or adding character to a newer build in Summerville, wainscoting creates a high-end, custom look that elevates your entire interior.
In this comprehensive guide, we’ll explore every wainscoting style, help you determine the ideal height for your rooms, compare material options, and explain why professional installation ensures a flawless, long-lasting result. By the end, you’ll have all the knowledge you need to make confident decisions about your wainscoting project.
What Is Wainscoting? A Brief History
Wainscoting originated in 18th-century Europe as a practical solution to protect plaster walls from damage caused by chair backs, foot traffic, and moisture. The lower portion of walls was clad with durable wood panels that could withstand daily wear while adding decorative appeal.
Today, wainscoting is purely decorative in most applications — though it still provides practical wall protection in high-traffic areas. In Charleston’s historic homes, original wainscoting is a prized architectural feature. In newer homes throughout Mount Pleasant, Summerville, and Goose Creek, adding wainscoting creates instant character and perceived value.
Popular Wainscoting Styles
1. Raised Panel Wainscoting
Raised panel is the most traditional and formal wainscoting style. It features rectangular panels with a raised center section surrounded by a profiled frame (stiles and rails). This style is synonymous with classic American architecture and is found in many of Charleston’s finest historic homes.
Raised panel wainscoting works best in formal spaces — dining rooms, studies, home offices, and entryways. The dimensional quality of the raised panels creates rich shadow lines that add depth and sophistication. This is the most labor-intensive style to install, requiring precision routing, assembly, and fitting.
2. Flat Panel (Recessed Panel) Wainscoting
Flat panel wainscoting uses the same stile-and-rail construction as raised panel, but the center panel is flat or slightly recessed rather than raised. This creates a cleaner, more contemporary look while maintaining the structured, architectural quality of traditional paneling.
This style bridges the gap between traditional and modern — it’s formal enough for a dining room but clean enough for a contemporary living space. We install flat panel wainscoting frequently in transitional homes throughout the Charleston area where homeowners want character without excessive ornamentation.
3. Beadboard Wainscoting
Beadboard consists of narrow vertical planks with a small rounded bead (groove) between each board. It’s the quintessential cottage and coastal style — perfect for Charleston’s Lowcountry aesthetic. Beadboard adds texture and charm without formality, making it ideal for kitchens, bathrooms, mudrooms, and casual living spaces.
Modern beadboard is available in individual planks or sheet form. For the most authentic look and best long-term performance, we recommend individual tongue-and-groove planks installed over a solid backing. Sheet beadboard is a budget-friendly alternative that works well in less visible areas.
4. Board-and-Batten Wainscoting
Board-and-batten features flat vertical boards with narrow strips (battens) covering the seams between them. This creates a bold, geometric pattern with strong vertical lines. It’s a versatile style that works in both farmhouse and modern contexts depending on the spacing and proportions.
The beauty of board-and-batten is its customizability — you can adjust the width of the boards and battens to create different visual effects. Wider boards with narrow battens create a more modern look, while equal-width boards and battens feel more traditional. This style is particularly popular in entryways and dining rooms.
5. Shaker-Style Wainscoting
Shaker wainscoting uses simple, flat-panel construction with minimal ornamentation — reflecting the Shaker philosophy of functional beauty. The frames are typically square-edged with no profiling, and the panels are flat. This creates a clean, understated look that’s extremely popular in modern farmhouse and transitional interiors.
6. Picture Frame Wainscoting
Picture frame wainscoting (also called “applied molding” or “shadow box” wainscoting) uses molding strips applied directly to the wall surface to create rectangular frames. Unlike traditional paneling, there’s no actual panel — just the molding creating the illusion of panels against the flat wall.
This is one of the most cost-effective wainscoting styles because it uses less material and can be installed more quickly. It’s elegant, versatile, and works in virtually any room. We often recommend picture frame wainscoting for bedrooms and living rooms where homeowners want architectural detail on a moderate budget.
Choosing the Right Wainscoting Height
The height of your wainscoting dramatically affects the room’s proportions and feel. Getting this right is critical — too short and it looks like an afterthought; too tall and it can make ceilings feel lower.
The One-Third Rule
The classic guideline is to install wainscoting at one-third of the wall height. For an 8-foot ceiling, that’s approximately 32 inches (including the cap rail). For a 9-foot ceiling, 36 inches. For a 10-foot ceiling, 40 inches. This proportion has been used for centuries and consistently produces pleasing results.
Height Variations by Room
Dining rooms: Traditional dining room wainscoting is typically 36-42 inches — roughly chair-rail height. This protects walls from chair backs while creating an elegant backdrop for furniture.
Bathrooms: Bathroom wainscoting can go higher — 48-54 inches — to provide moisture protection and visual weight in a smaller space. Taller wainscoting in bathrooms also creates a spa-like, finished feel.
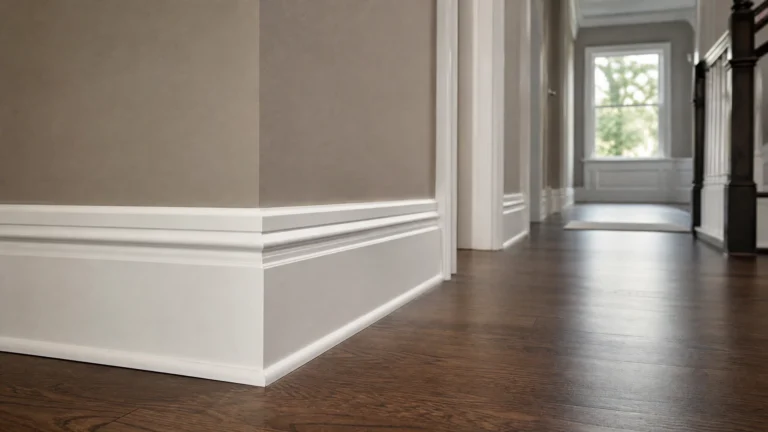
Hallways and staircases: In hallways, wainscoting at 36 inches provides wall protection in high-traffic areas. On staircases, wainscoting follows the stair angle and typically aligns with the handrail height.
Full-height paneling: In some applications — particularly home offices, libraries, and formal studies — wainscoting extends from floor to ceiling for a fully paneled room. This creates a dramatic, high-end look that’s particularly stunning with built-in bookcases.
Materials for Wainscoting in Charleston Homes
Solid Wood
Solid wood (typically poplar, pine, or maple) is the premium choice for wainscoting. It’s durable, repairable, and has a quality feel that’s hard to replicate. In Charleston’s humid climate, we recommend kiln-dried poplar for painted applications — it’s stable, takes paint beautifully, and resists warping better than pine.
MDF (Medium-Density Fiberboard)
MDF is the most popular material for painted wainscoting in modern installations. It’s perfectly smooth (no grain to telegraph through paint), dimensionally stable, and significantly more affordable than solid wood. MDF panels and moldings are available in every profile imaginable.
The main limitation of MDF is moisture sensitivity — it can swell if exposed to standing water. For bathrooms, we use moisture-resistant MDF or PVC alternatives. In dry areas like dining rooms and bedrooms, standard MDF performs excellently.
PVC and Composite
For bathrooms, laundry rooms, and any area with high moisture exposure, PVC wainscoting is the ideal choice. It’s completely waterproof, won’t rot or swell, and modern PVC profiles are virtually indistinguishable from painted wood. The initial cost is higher than MDF, but the longevity in wet environments makes it worthwhile.
Installation Process: What to Expect
Professional wainscoting installation is a multi-step process that requires careful planning, precise measurements, and expert craftsmanship. Here’s what a typical project looks like:
Step 1: Design & Layout
We begin by measuring your room and creating a detailed layout plan. This determines panel sizes, spacing, and how the design wraps around corners, windows, and doors. Proper planning ensures symmetrical panel placement and consistent proportions throughout the room.
Step 2: Wall Preparation
Walls are inspected for levelness and any issues are addressed. Electrical outlets and switches within the wainscoting zone are noted for box extenders. If the walls have significant irregularities, we may install furring strips to create a flat mounting surface.
Step 3: Installation
The base rail is installed first, leveled precisely. Then panels or boards are installed, followed by stiles, rails, and cap molding. Every joint is glued and pinned for permanence. Inside and outside corners are carefully mitered or coped for seamless transitions.
Step 4: Finishing
All nail holes are filled, joints are caulked, and the entire installation is sanded smooth. If we’re handling the painting, we apply primer and two coats of premium paint for a flawless, furniture-quality finish.
Wainscoting in Different Rooms
Dining Room Wainscoting
The dining room is the most popular room for wainscoting installation. Raised panel or flat panel styles at 36-42 inches create a formal, elegant backdrop for entertaining. Paired with crown molding above, the effect is stunning.
Bathroom Wainscoting
Bathrooms benefit from taller wainscoting (48-54 inches) in moisture-resistant materials. Beadboard and shaker styles are particularly popular in bathrooms, creating a clean, spa-like atmosphere while protecting walls from water splashes.
Bedroom Wainscoting
In bedrooms, wainscoting creates a cozy, finished feel. Board-and-batten or picture frame styles work beautifully behind the bed as a headboard wall treatment. The height can vary — some homeowners prefer full-height paneling behind the bed with standard height on remaining walls.
Staircase Wainscoting
Wainscoting along a staircase adds elegance to one of the most visible areas of your home. The panels follow the stair angle, requiring precise angled cuts at top and bottom. Combined with quality staircase trim and railings, the result is a cohesive, high-end look.
Cost Considerations
Wainscoting costs vary significantly based on style, material, room size, and complexity. Here’s a general framework:
- Picture frame/applied molding: Most affordable — uses less material and installs faster
- Board-and-batten: Moderate cost — straightforward installation with standard lumber
- Beadboard: Moderate cost — individual planks cost more than sheets but look better
- Flat panel: Higher cost — requires more material and precise frame construction
- Raised panel: Highest cost — most material-intensive and labor-intensive style
We provide detailed, itemized estimates for every wainscoting project. Our quotes include all materials, labor, and finishing work. Contact us for a free estimate tailored to your specific room and style preferences.
Why Professional Installation Makes the Difference
Wainscoting installation requires a high level of precision — panels must be perfectly level, evenly spaced, and seamlessly joined at every corner and transition. Common DIY pitfalls include:
- Uneven panel spacing that’s visible from across the room
- Gaps at corners where walls aren’t perfectly square
- Cap rail that isn’t level, creating a visible slope
- Poor integration around electrical outlets and switches
- Inadequate caulking that leads to visible seams after painting
At DiLeo’s Carpentry LLC, we bring years of finish carpentry experience to every wainscoting project. Our work is precise, our materials are premium, and our attention to detail ensures a result that looks custom-built — because it is.
Frequently Asked Questions
Can wainscoting be installed over existing drywall?
Yes — in fact, this is the standard method. Wainscoting is installed directly over existing drywall using construction adhesive and finish nails. There’s no need to remove existing wall surfaces.
Does wainscoting increase home value?
Yes. Wainscoting is consistently cited by real estate professionals as a feature that increases perceived home value. It signals quality construction and attention to detail — qualities that buyers in the Charleston market particularly appreciate.
How long does wainscoting installation take?
A typical dining room wainscoting project takes 2-4 days depending on style complexity. Simpler styles like board-and-batten install faster, while raised panel requires more time for precise fitting and assembly.
What color should wainscoting be painted?
White and off-white remain the most popular choices, creating a classic contrast with wall color above. However, we’re seeing more homeowners choose bold colors — deep navy, forest green, or charcoal — for dramatic effect. Some prefer painting wainscoting the same color as the wall for a subtle, textural look.
Conclusion
Wainscoting is a timeless architectural element that adds character, protection, and value to your Charleston home. Whether you choose the formal elegance of raised panels, the coastal charm of beadboard, or the modern simplicity of board-and-batten, professional installation ensures a result that looks stunning for decades to come.
DiLeo’s Carpentry LLC specializes in custom wainscoting and wall paneling installation throughout the Charleston Lowcountry. As a veteran-owned business, we bring precision, integrity, and craftsmanship to every project. Request your free estimate today and let’s transform your walls.
References
- Architectural Woodwork Institute — Panel & Wainscoting Standards
- National Association of Home Builders — Interior Trim Best Practices
- This Old House — Wainscoting Installation Guide
- Charleston Preservation Society — Historic Interior Restoration
 Veteran-Owned
  5-Star Rated
  24hr Response